IPFire Linux Firewall
In this tutorial we will build a proper firewall with IPFire.
First of all we need to decide which hardware we should use.
The minimum requirements for IPFire:
- 1 Ghz i586 processor
- 1 GB RAM
- 2 GB of disc space
- At least 2 network cards
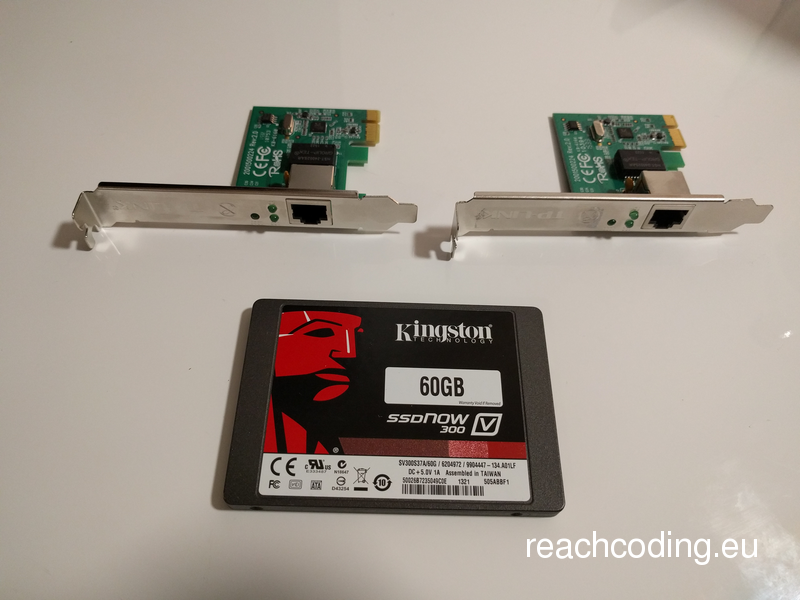
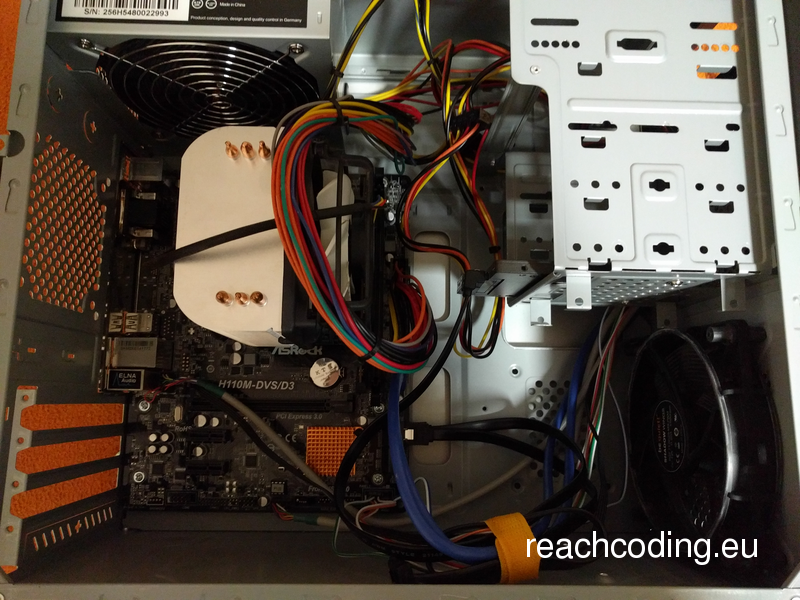
Here is my hardware setup for this tutorial:
- Intel Pentium G4400 @ 2 x 3.30 Ghz
- Asus H110M-DVS/D3 mainboard
- 2 GB DDR3 ECC RAM (unbuffered)
- Kingston SSDNow V300 60 GB SSD
- 2 TP-Link Gigabit NICs (and a onboard one)
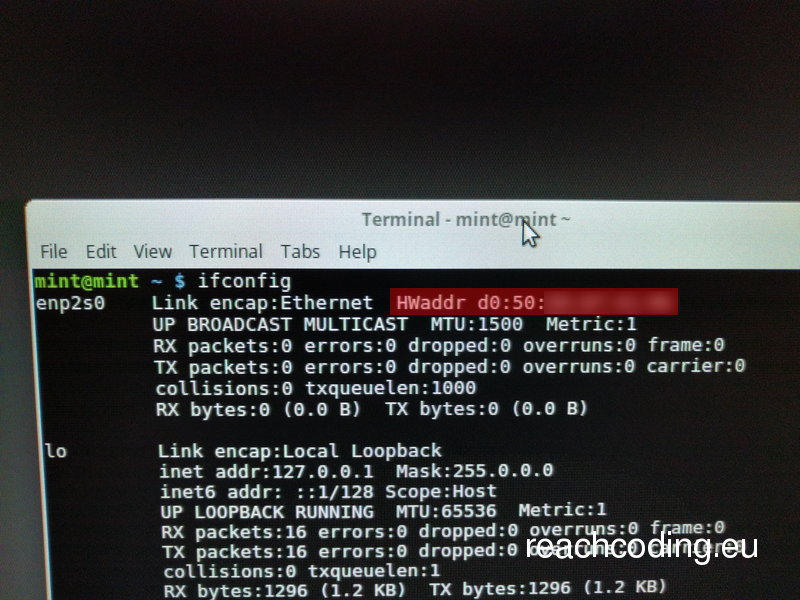
First we have to figure out the mac addresses of our network cards. Start a Linux live distribution from a USB flash drive or DVD and open up a terminal.
Type in the command ifconfig . Now we have the mac address of our onboard NIC. Write down the address to a piece of paper:
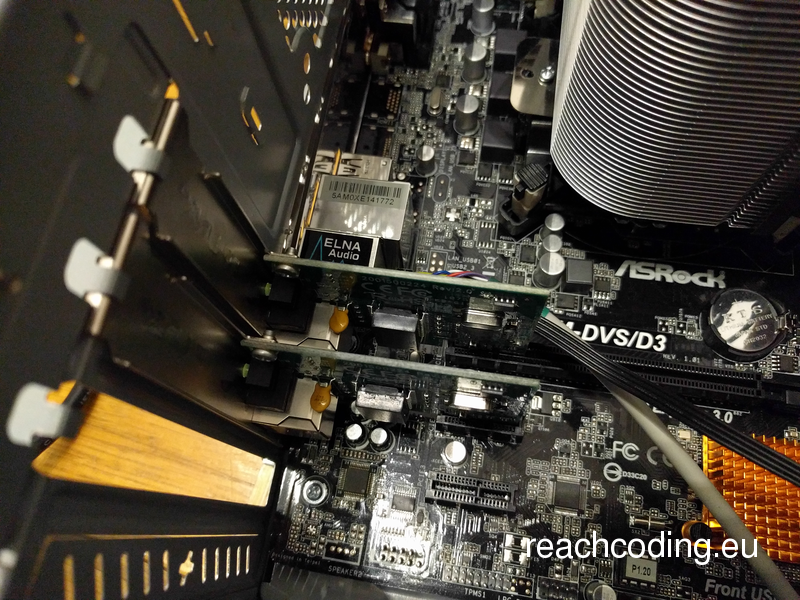
You can now turn off your pc and put the first PCIe network card into it:

Start the Linux live distribution again and take a note of the new mac address:
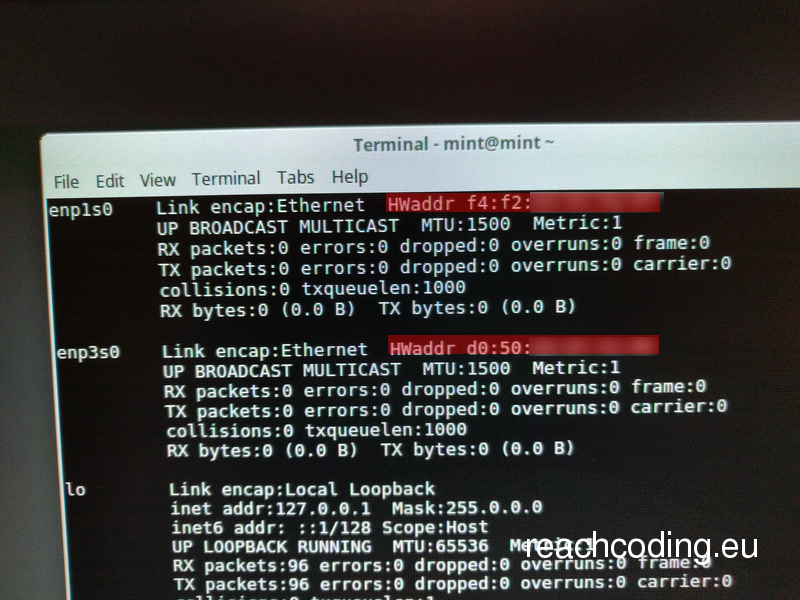
Do the same steps for the last network card:

Now we are ready to install IPFire. Download the latest IPFire image. Get the SHA1 checksum of the downloaded image and compare it to the one on the IPFire website:

Burn the image to a cd or put it on a usb flash drive and boot from it:

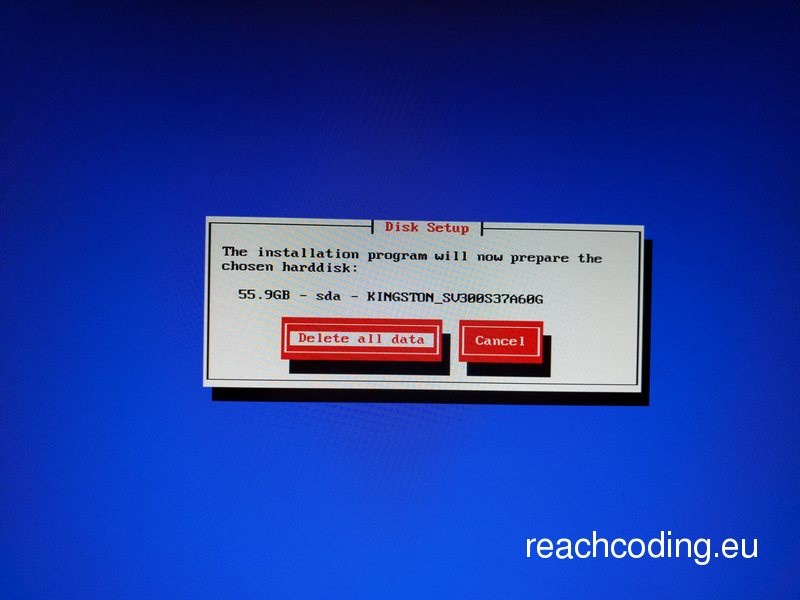
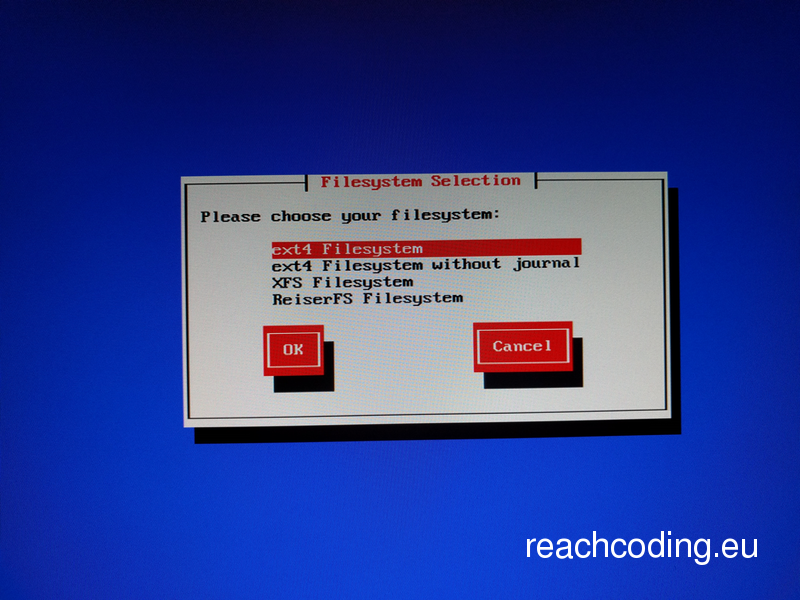
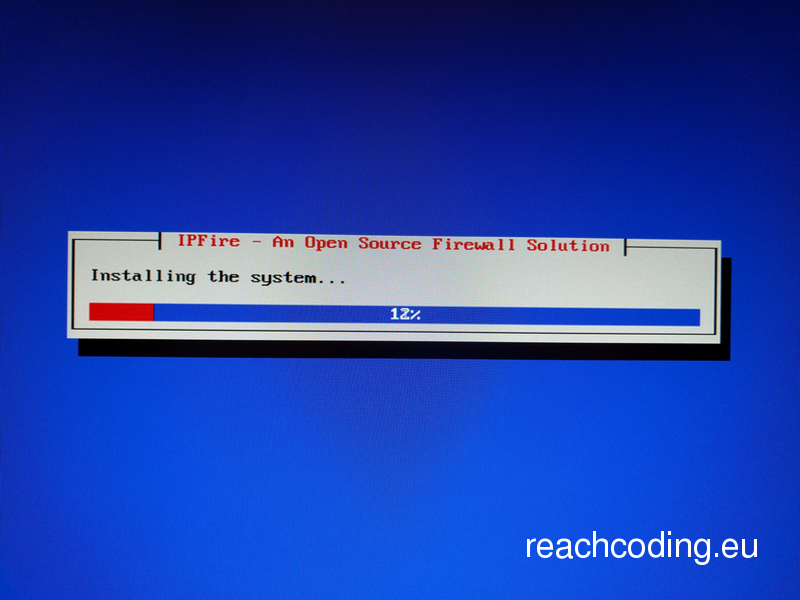
The first dialogs are just the generic stuff like language and filesystem. Nothing too exciting here:
If the installation is complete you have to restart the pc and remove the installation medium:

After some keyboard layout settings the interesting stuff begins. Now we have to choose a hostname and a domainname. For a home network it doesnt really matter what you choose:

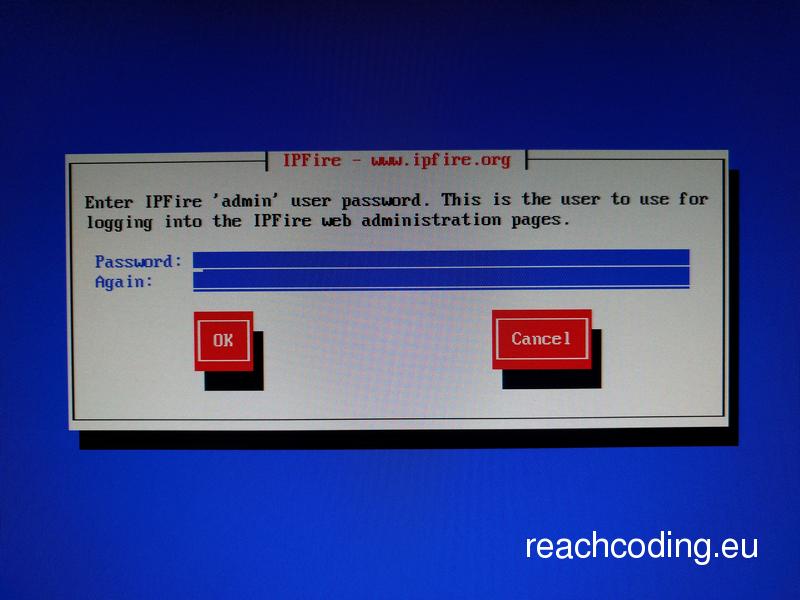
Then we have to type in the root and the admin password. The admin password is necessary to access the webinterface:
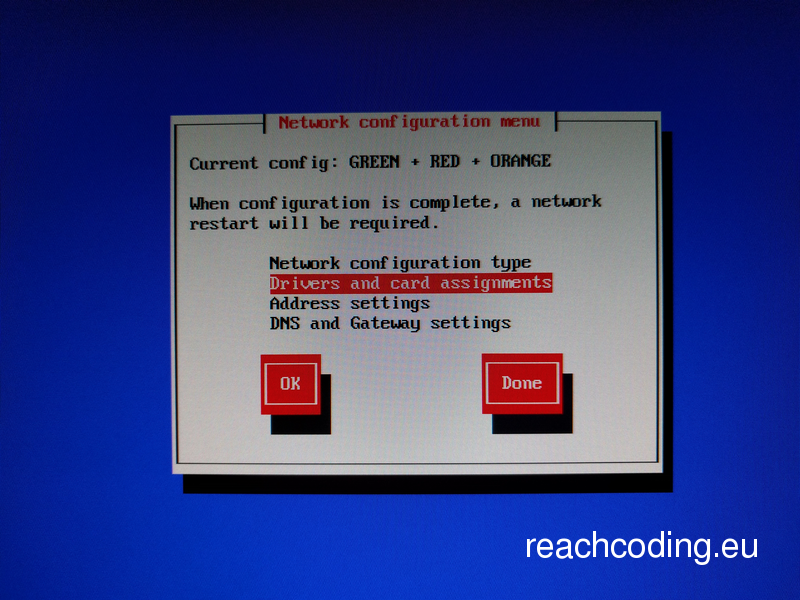
Now we have to choose the network type. We have 3 NICs so we can use a type with 3 zones:
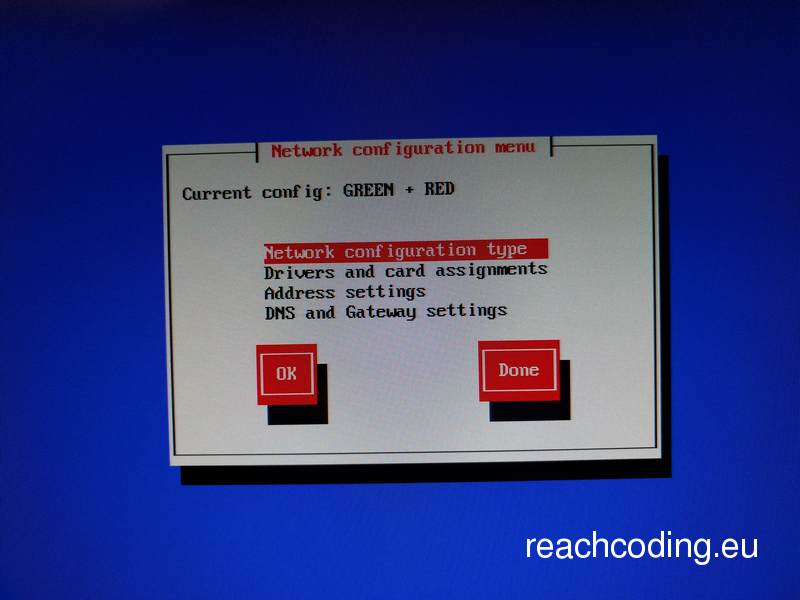
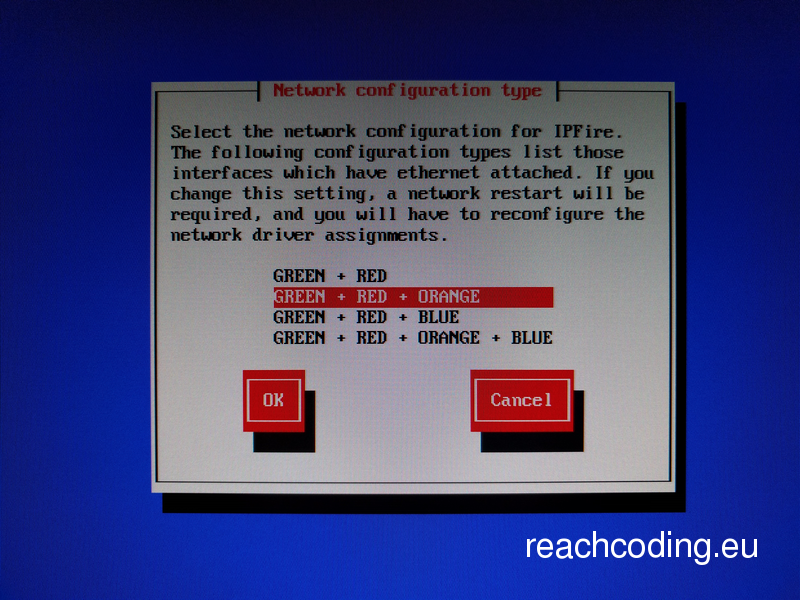
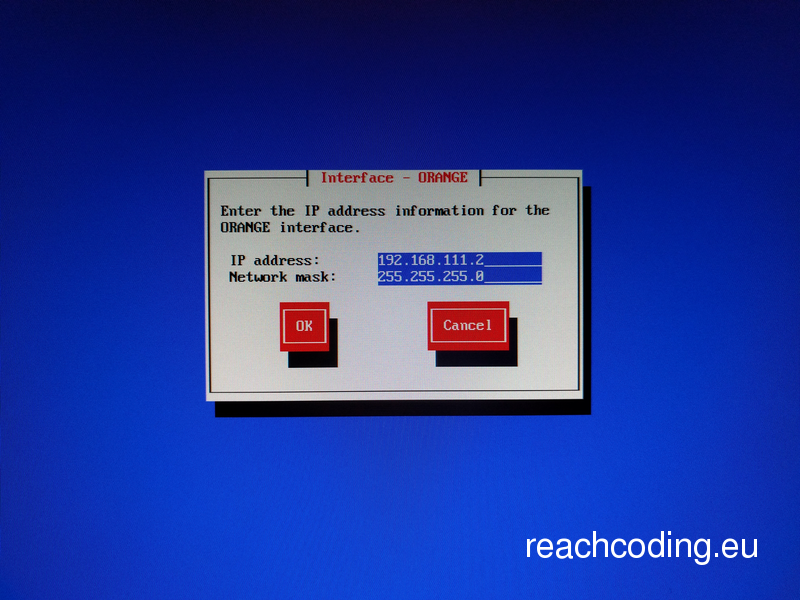
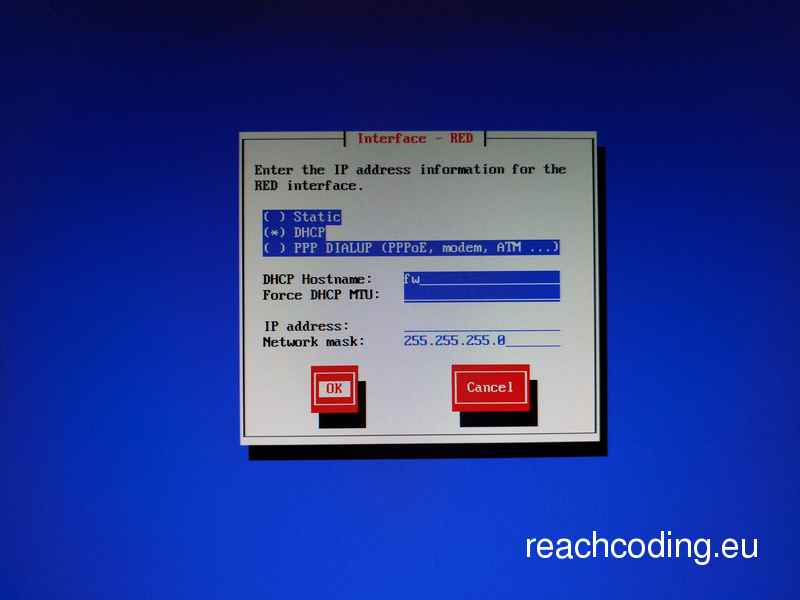
- GREEN = LAN
- RED = WAN/Internet
- ORANGE = DMZ
- BLUE = Separated zone for Wireless Networks
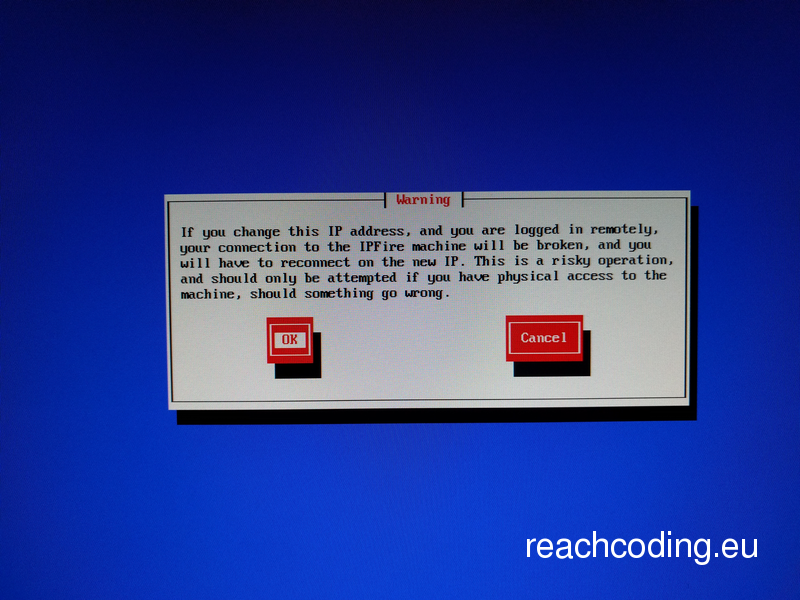
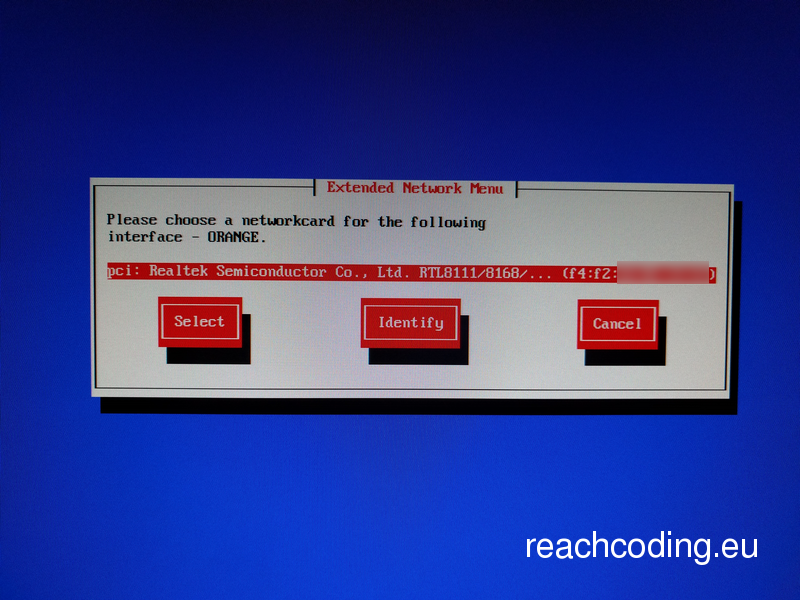
In the next steps we have to assign the network cards to our zones. I hope you have noted the mac addresses of your NICs, otherwise it is hard to figure out which one is which ;-)
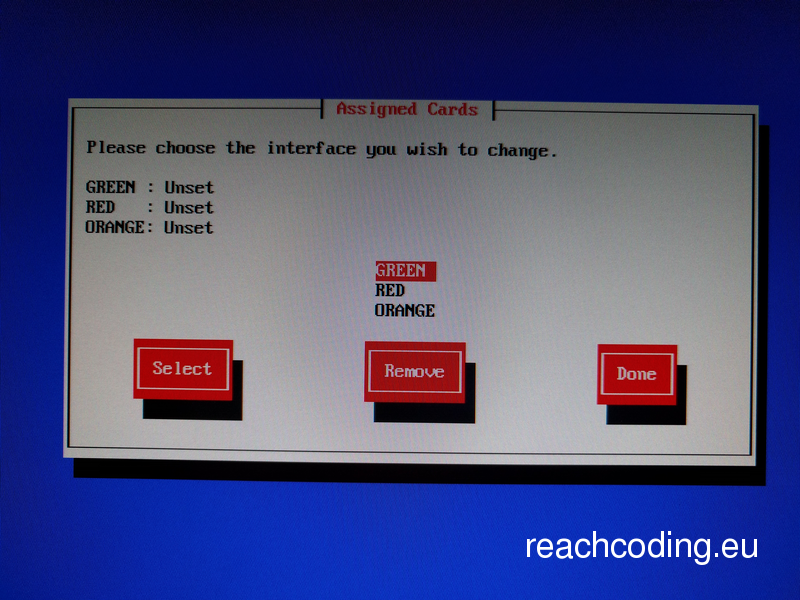
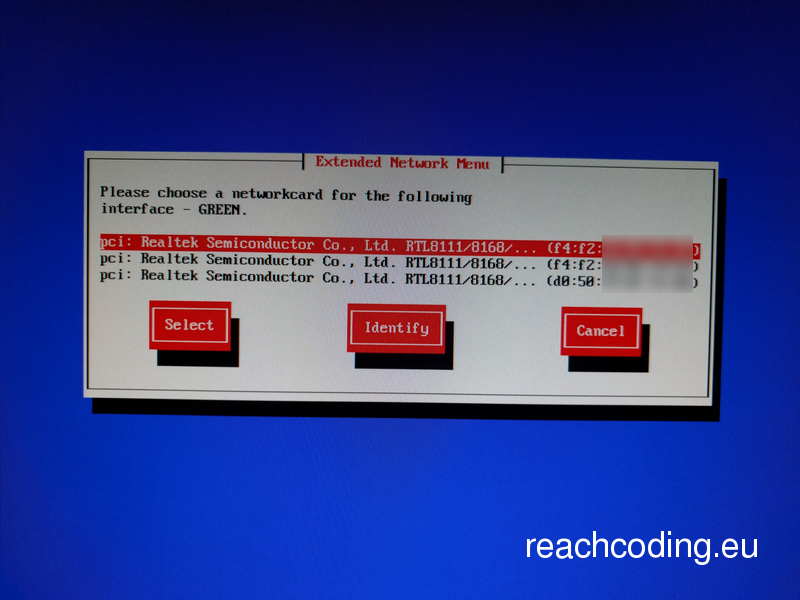

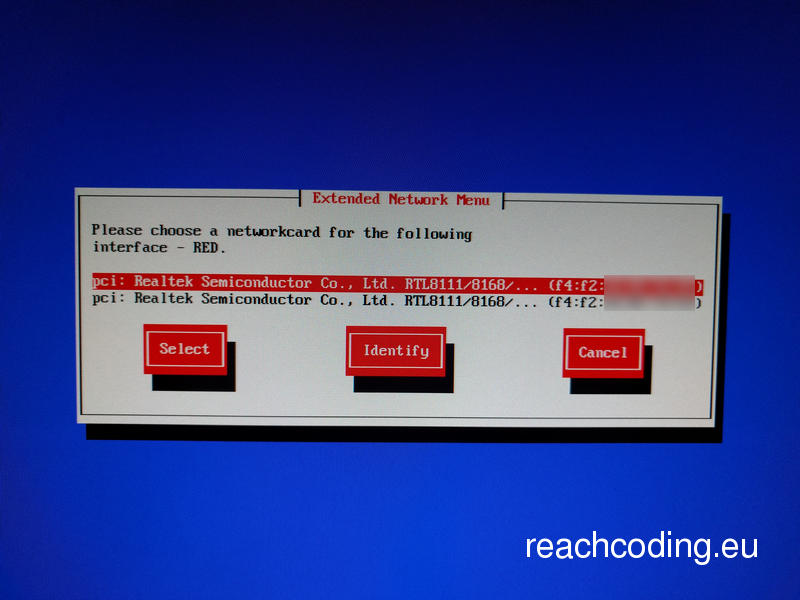
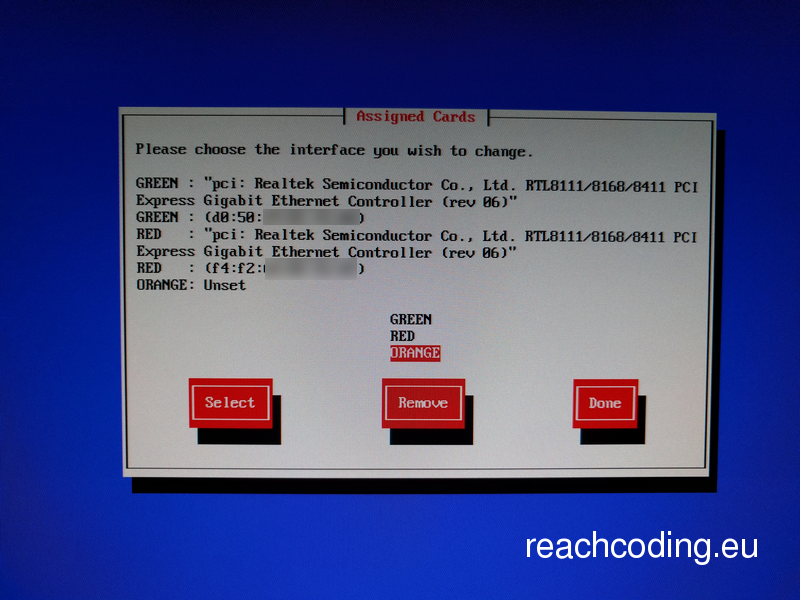
You should put some labels on the NICs to prevent mixing up the zones after reconnecting the network cables:

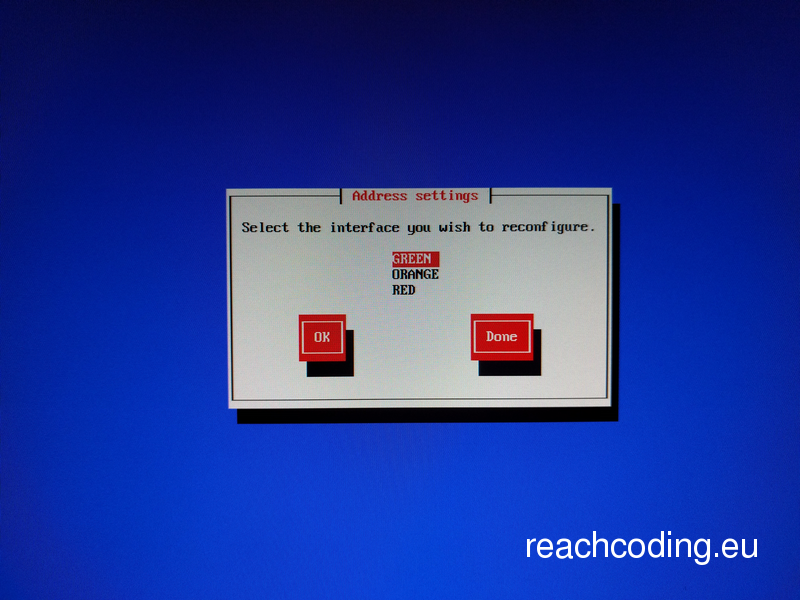
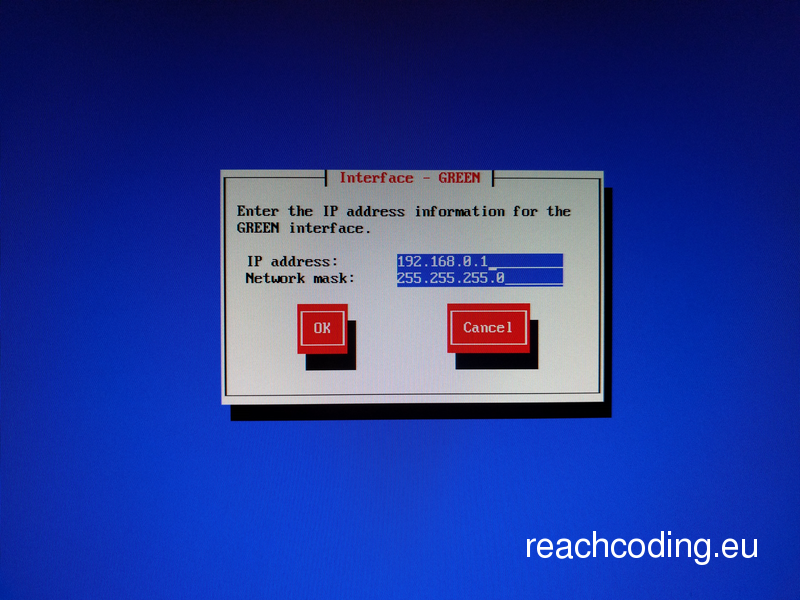
In the last step we have to define subnets for the GREEN and the ORANGE zone. For the RED zone I use DHCP because I have no static IP in my home office:

Now you can connect your modem to the red interface and your local network switch to the green interface. To access the webinterface type https://192.168.0.1:444 into your browser. The username is admin and the password is the one you have chosen in an earlier step:

NOTE: In some cases you have to restart your modem when the mac address of the connected NIC changes.